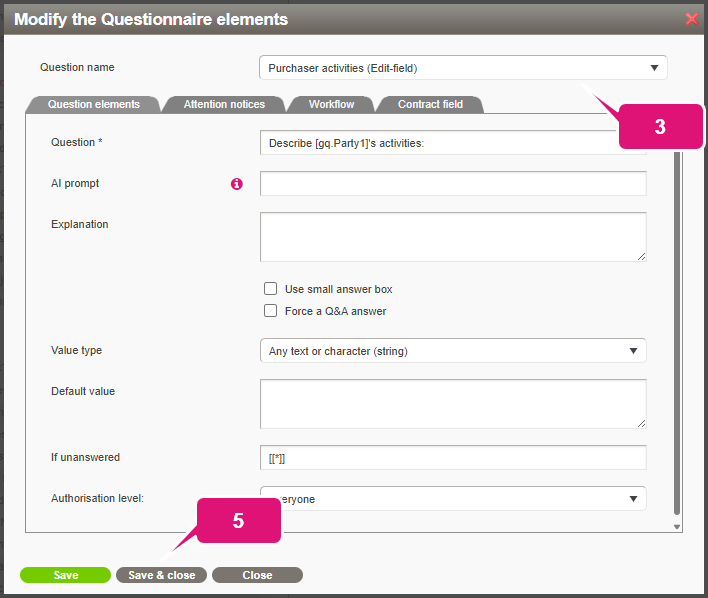
The most basic type of question you can add to your contract template is an editable field. It simply produces a text field in which the user can type an answer. The advantage is that it is intuitive and versatile, permitting both short responses as well as longer custom input. Editable fields may also be configured to accept only numbers (with or without decimals), so that the user’s input will always be uniform – no unwanted switching between numerals and written out numbers – and can be used for automated calculations.
TABLE OF CONTENTS
A. Creating an editable field
B. Optional and advanced settings
C. Custom document title
D. Editing an editable field
A. CREATING AN EDITABLE FIELD
Editable fields use the tag format [edit.Name]. The tag will be replaced by the user’s input.
1. Select the text that must be replaced by the user’s input (or position the cursor where it must be inserted).
2. Click Insert an editable field. A pop-up will appear.
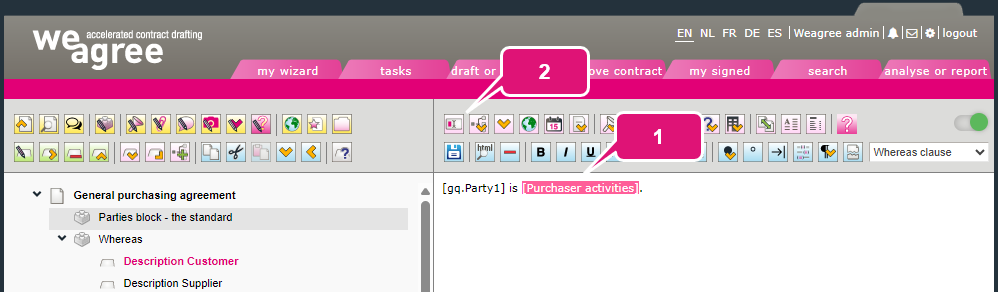
3. Enter a name for the tag. You may use spaces. A short, descriptive one (e.g. Product price or Milestone 1) is recommended; avoid putting in actual questions or answers.
4. Click Insert. Another pop-up will appear.
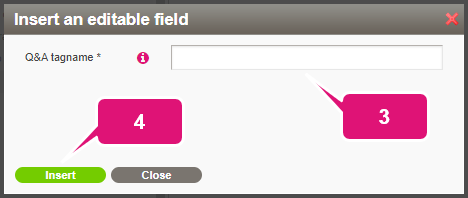
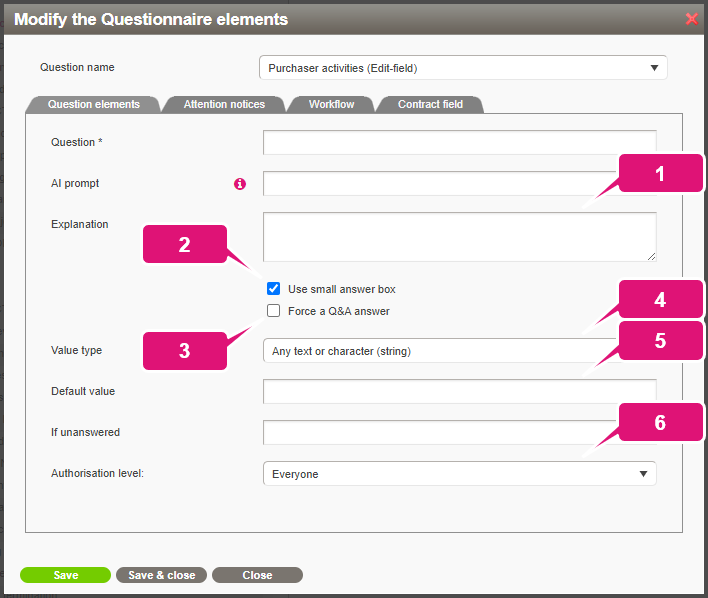
5. Formulate the question. This will be shown to the user in the questionnaire (Q&A).
6. Enter an If unanswered placeholder. This placeholder will appear in the Q&A’s WYSIWYG view (‘underwater screen’) and generated document if no other answer has been provided.
Note: using square brackets for the placeholder (e.g. “[PLACEHOLDER]”) is usually practical, as you can easily search for those in the generated document. To add a ‘blob’, use [[*]] with double brackets.
7. Click Save & close.
8. Click Save the changes made (or press Ctrl+S).
B. OPTIONAL AND ADVANCED SETTINGS
When creating or editing (see section D below) an editable field, you may also want to consider the following settings.
1. Enter an explanation to provide user guidance for answering the question. In the Q&A, a small warning icon will be displayed to the right of the question. The icon will have the explanation as its tooltip.
2. Deselect Use small answer box to produce a multi-line, resizable input field instead of a fixed single-line field. Use this if the user may have to type in one or more complete sentences or multiple short lines of text.
3. Enable Force a Q&A answer if this question must be answered before the user may generate a document.
Note: this will not visually change the Q&A. Consider adding an explanation or attention notice – see below – to alert the user to this field’s mandatory nature.
4. Change Value type if the user should only be able to enter a number (with or without decimals). The field will then refuse letters and special characters.
Note: this also facilitates uniform formatting of numerical values across different documents. Moreover, it ensures that automated calculations will work. For more information, click here.
5. Enter a default value if a particular answer will usually apply or if you want to provide a format for the answer. For example, you might use “_____ [weeks/months]” or “_____ per _____” to indicate the expected type of value or syntax. It will be automatically filled in at the start of the Q&A for the user to double-check or complete.
6. Change the authorisation level if the question should be hidden from certain users. This may be indicated for sensitive or complex matters that not every user is or should be able to determine. For more information about authorisation levels, click here.
Note: be aware that if a question is hidden this way, it will still be taken into account when generating a document. It is therefore highly recommended to at least fill in the If unanswered field (so that a senior member will be able to easily find and correct this variable in the generated document). If possible, however, provide a default value so that a generally acceptable answer will always appear in the document.
7. Add an attention notice (bold, magenta text displayed beneath the question during the Q&A) for especially important explanatory information:
a. Open the Attention notices subtab.
b. Enter the attention notice.
Note: if Force a Q&A answer has been enabled, it is often a good idea to add an attention notice pointing out that this field is mandatory. This will help prevent confusion at the end of the Q&A and make the field easier to find again if it is initially skipped for any reason.
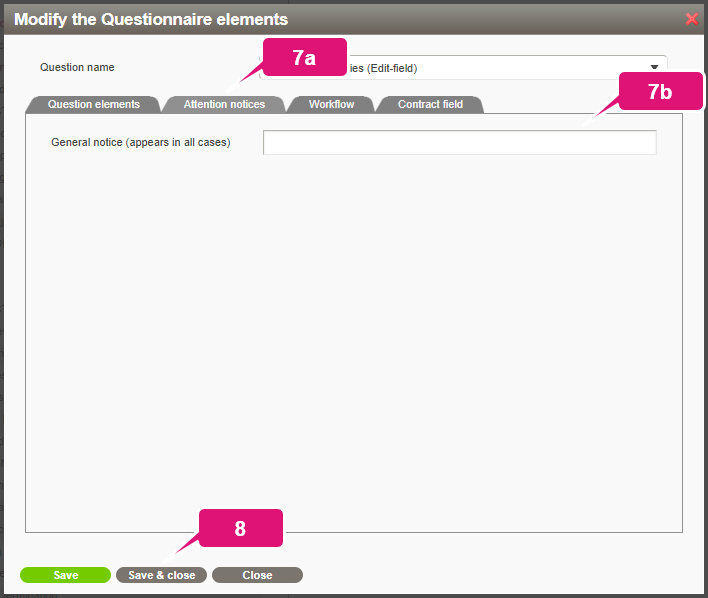
8. Click Save & close.
C. CUSTOM DOCUMENT TITLE
You may permit the user to customise the document title during the Q&A. This is done by inserting the editable field [edit.contract title].
1. Enable Show advanced vs. all basic functionalities.
2. Click Insert a modifiable contract title.

3. Configure the question as described above and save your changes.
4. Insert the tag [DocumentTitle] where the custom title should appear.
D. EDITING AN EDITABLE FIELD
Once created, all aspects of an editable field except for its tag name can be edited.
1. Select the template component containing the editable field.
2. Click Modify the questionnaire elements (question formation, default answer or explanation). A pop-up will appear.
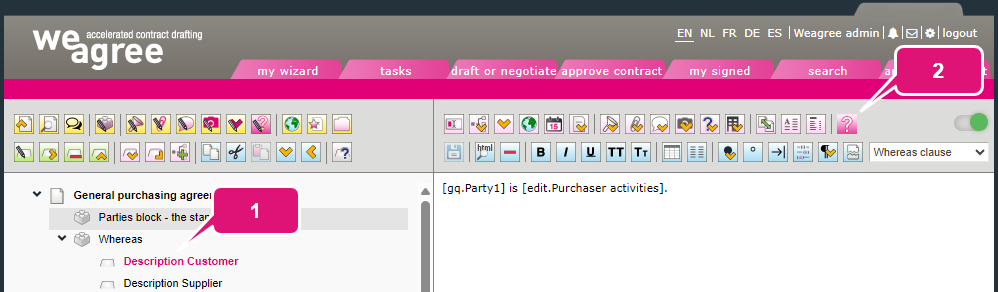
3. Select the applicable question (if the template component contains more than one).
4. Make the necessary changes.
5. Click Save & close (or Save if you want to edit another question in the same template component).