
The Weagree Wizard can act as a repository for reference materials: the original model contracts and ‘all-options’ documents. The former are simply the source documents on which the Weagree templates are based; the latter are effectively the Weagree templates turned back into Word-format model contracts.
Contracts generated in Weagree and all-options documents can be compared to the originals for testing and double-checking purposes, while all-options documents also preserve Weagree templates in a standalone form, independently of the Weagree Wizard. They contain not only all the static text, but also all the questions (variables) of a given template. As Word documents, they lack the dynamic qualities of a Weagree questionnaire of course, but they can be a useful backup and can help you verify that a Weagree template is accurate and complete, or update your regular model contracts over time.
Original model contract and all-options documents can be managed from within the Template Creation Tool.
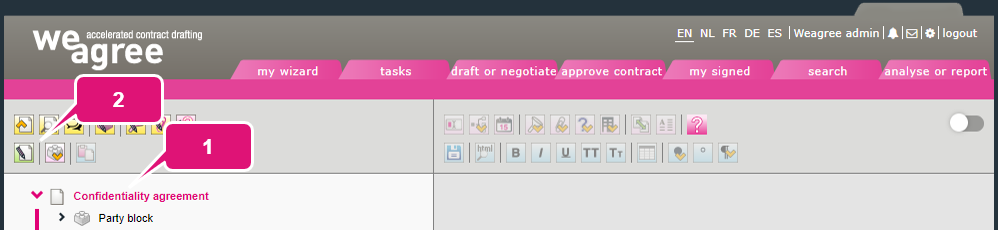
1. Click on the template name at the top of the outline.
2. Click Edit the template settings.
3. Open the Originals tab.
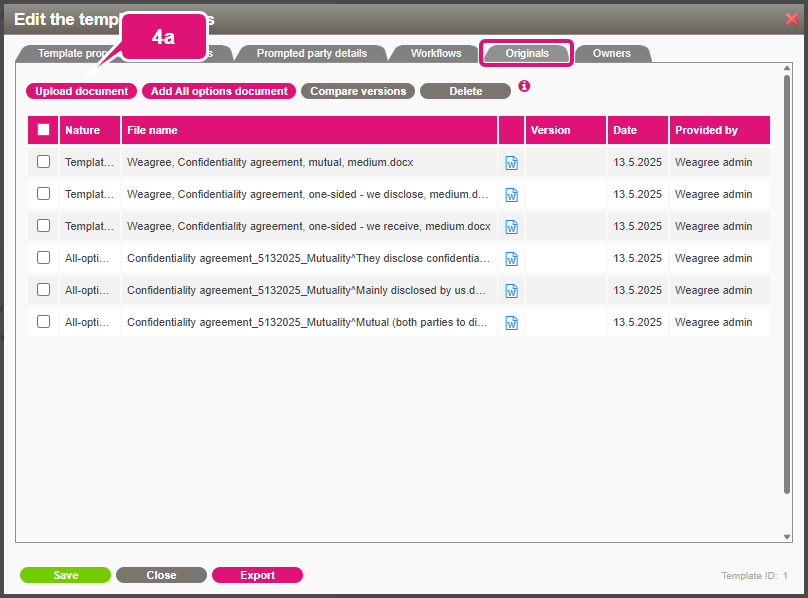
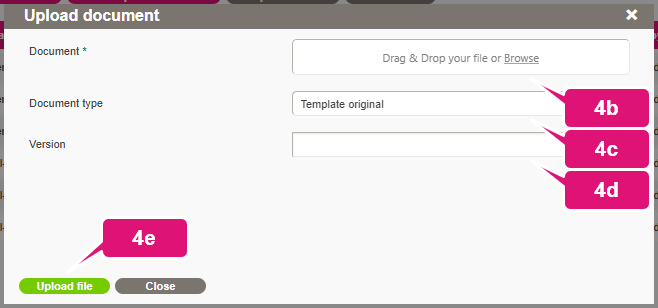
4. To add an existing document:
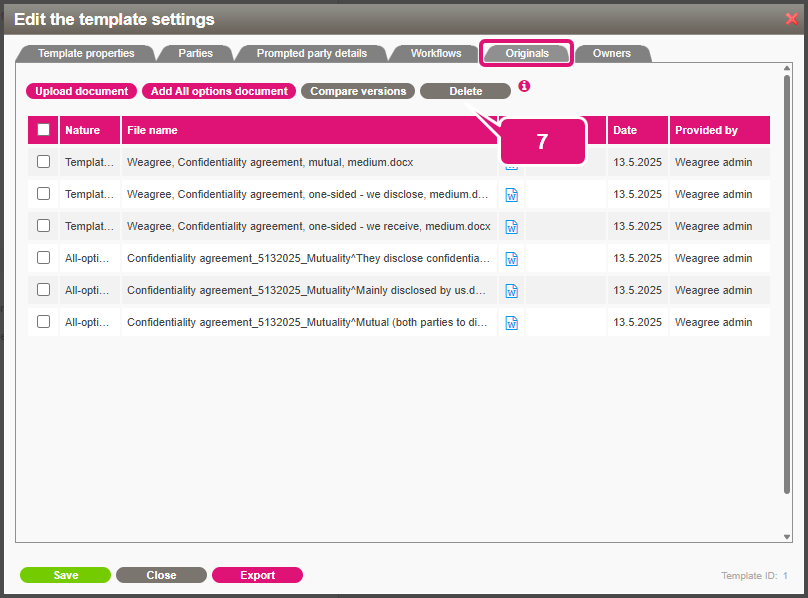
a. Click Upload document.
b. Drag-and-drop the file to the Document field, or click on the field to browse your computer or network for the file.
c. Select the type of document being uploaded.
d. Optionally, enter a version number.
e. Click Upload file.
Note: when you use the automated import function of the Weagree Wizard (for more information, click here), the document you will upload will be automatically saved as an original version.
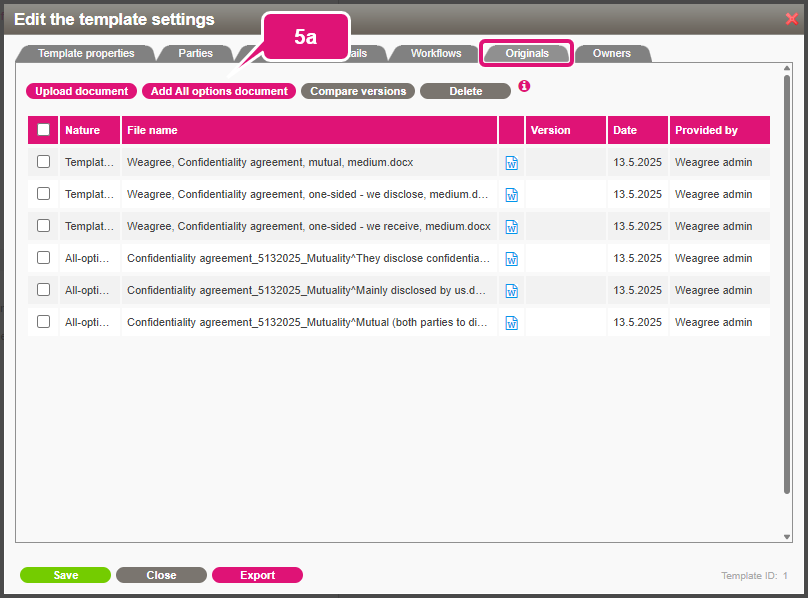
5. To create a new all-options document:
a. Click Add All options document.
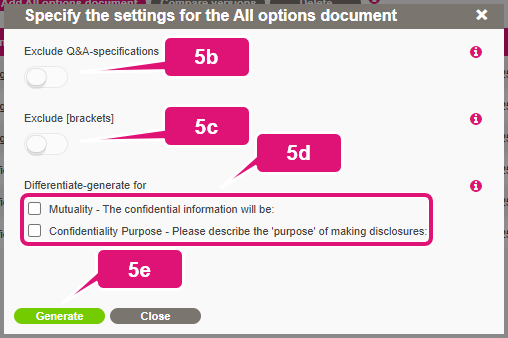
b. Optionally, enable Exclude Q&A-specifications. When enabled, superscript text detailing a question’s database name (e.g. “Effective date” or “Duration”) and the designated option (e.g. “Mutual” for a question about who will be disclosing confidential information) will be omitted from the document. This may make for more convenient reading of the document if the template is very straightforward and includes few if any choice questions.
c. Optionally, enable Exclude [brackets]. When enabled, brackets marking all questions (variables) of the template will be omitted. Again, this may make for more convenient reading depending on the simplicity of the template.
d. Optionally, select one or more of the available options under Differentiate-generate for. The options listed will include all the template’s global choice questions (if any). By selecting any such question, an all-options version will be generated for each of the question’s possible answers, from which the other answers are omitted.
For example: if the template is an NDA containing a question about who will be disclosing confidential information, and the possible answers are “Mutual”, “We disclose” and “They disclose”, three versions of the all-options document will be generated, one based on each answer. Each version will only contain the text to be included (or excluded) for the designated answer. In other words, text that is variable as a result of the question becomes static. This means no Q&A-specifications or brackets for that question, improving readability and making it easier to compare different scenarios.
Note: selecting multiple questions here has an exponential effect as an all-options version will be generated for each combination of answers (e.g. answer 1 of question 1, together with answer 1 of question 2, together with answer 1 of question 3). For example: if you select three questions simultaneously, and each of those has three possible answers, this will result in 3 x 3 x 3 = 27 all-options documents altogether. Be careful with such combinations, therefore.
e. Click Generate.
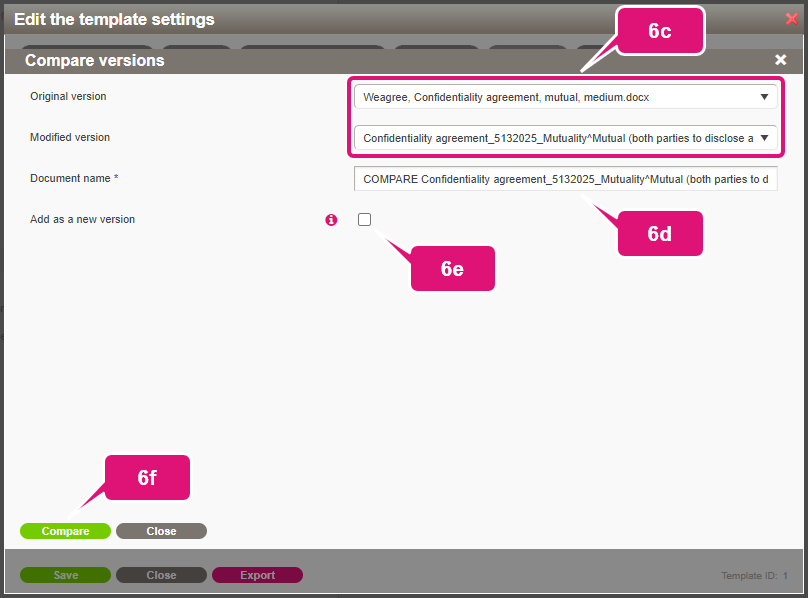
6. To create a Word comparison between two documents (redlining the differences):
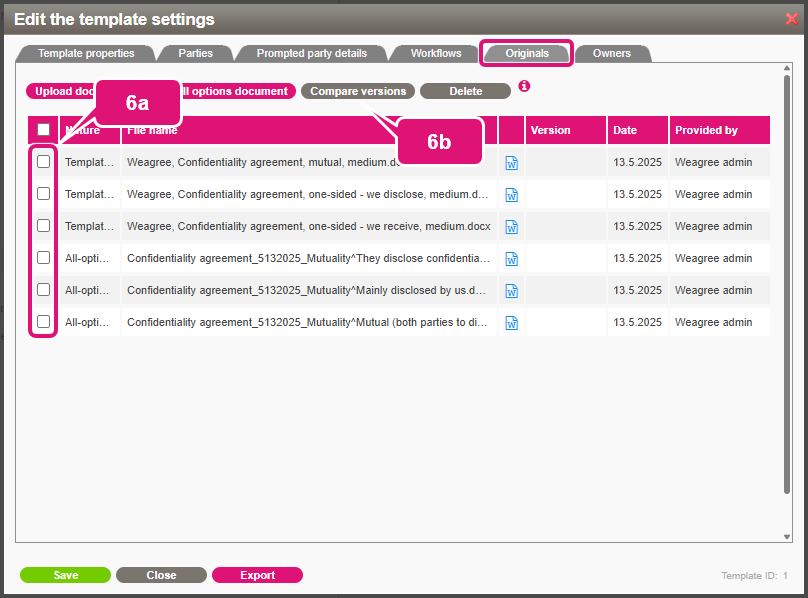
a. Select two documents.
b. Click Compare versions.
c. Confirm or correct which is the original and which is the modified version.
d. Optionally, change the document name.
e. Optionally, enable Add as a new version. By default, a Word document will be generated for you as a one-time download. When enabled, the document will be added to this repository.
f. Click Compare.
7. Click Delete to remove any selected documents.